Introduction
ARM-based processors have transformed the computing landscape, introducing greater efficiency and performance to various devices. Apple has been at the forefront of this revolution with its Apple Silicon lineup, including the M1, M2, and potentially M3 chips. Windows enthusiasts who own these devices might be excited to explore the possibility of running Windows 11 on Apple Silicon using the ARM64 Insider Preview. This article will delve into the steps to achieve this intriguing cross-platform setup.
The Apple Silicon Advantage
Apple Silicon processors, powered by ARM architecture, have gained immense popularity for their impressive power efficiency and performance. These chips have redefined the performance standards for laptops and desktops and Playbooknstrated potential for supporting other operating systems, such as Windows.
Windows 11 ARM64 Insider Preview
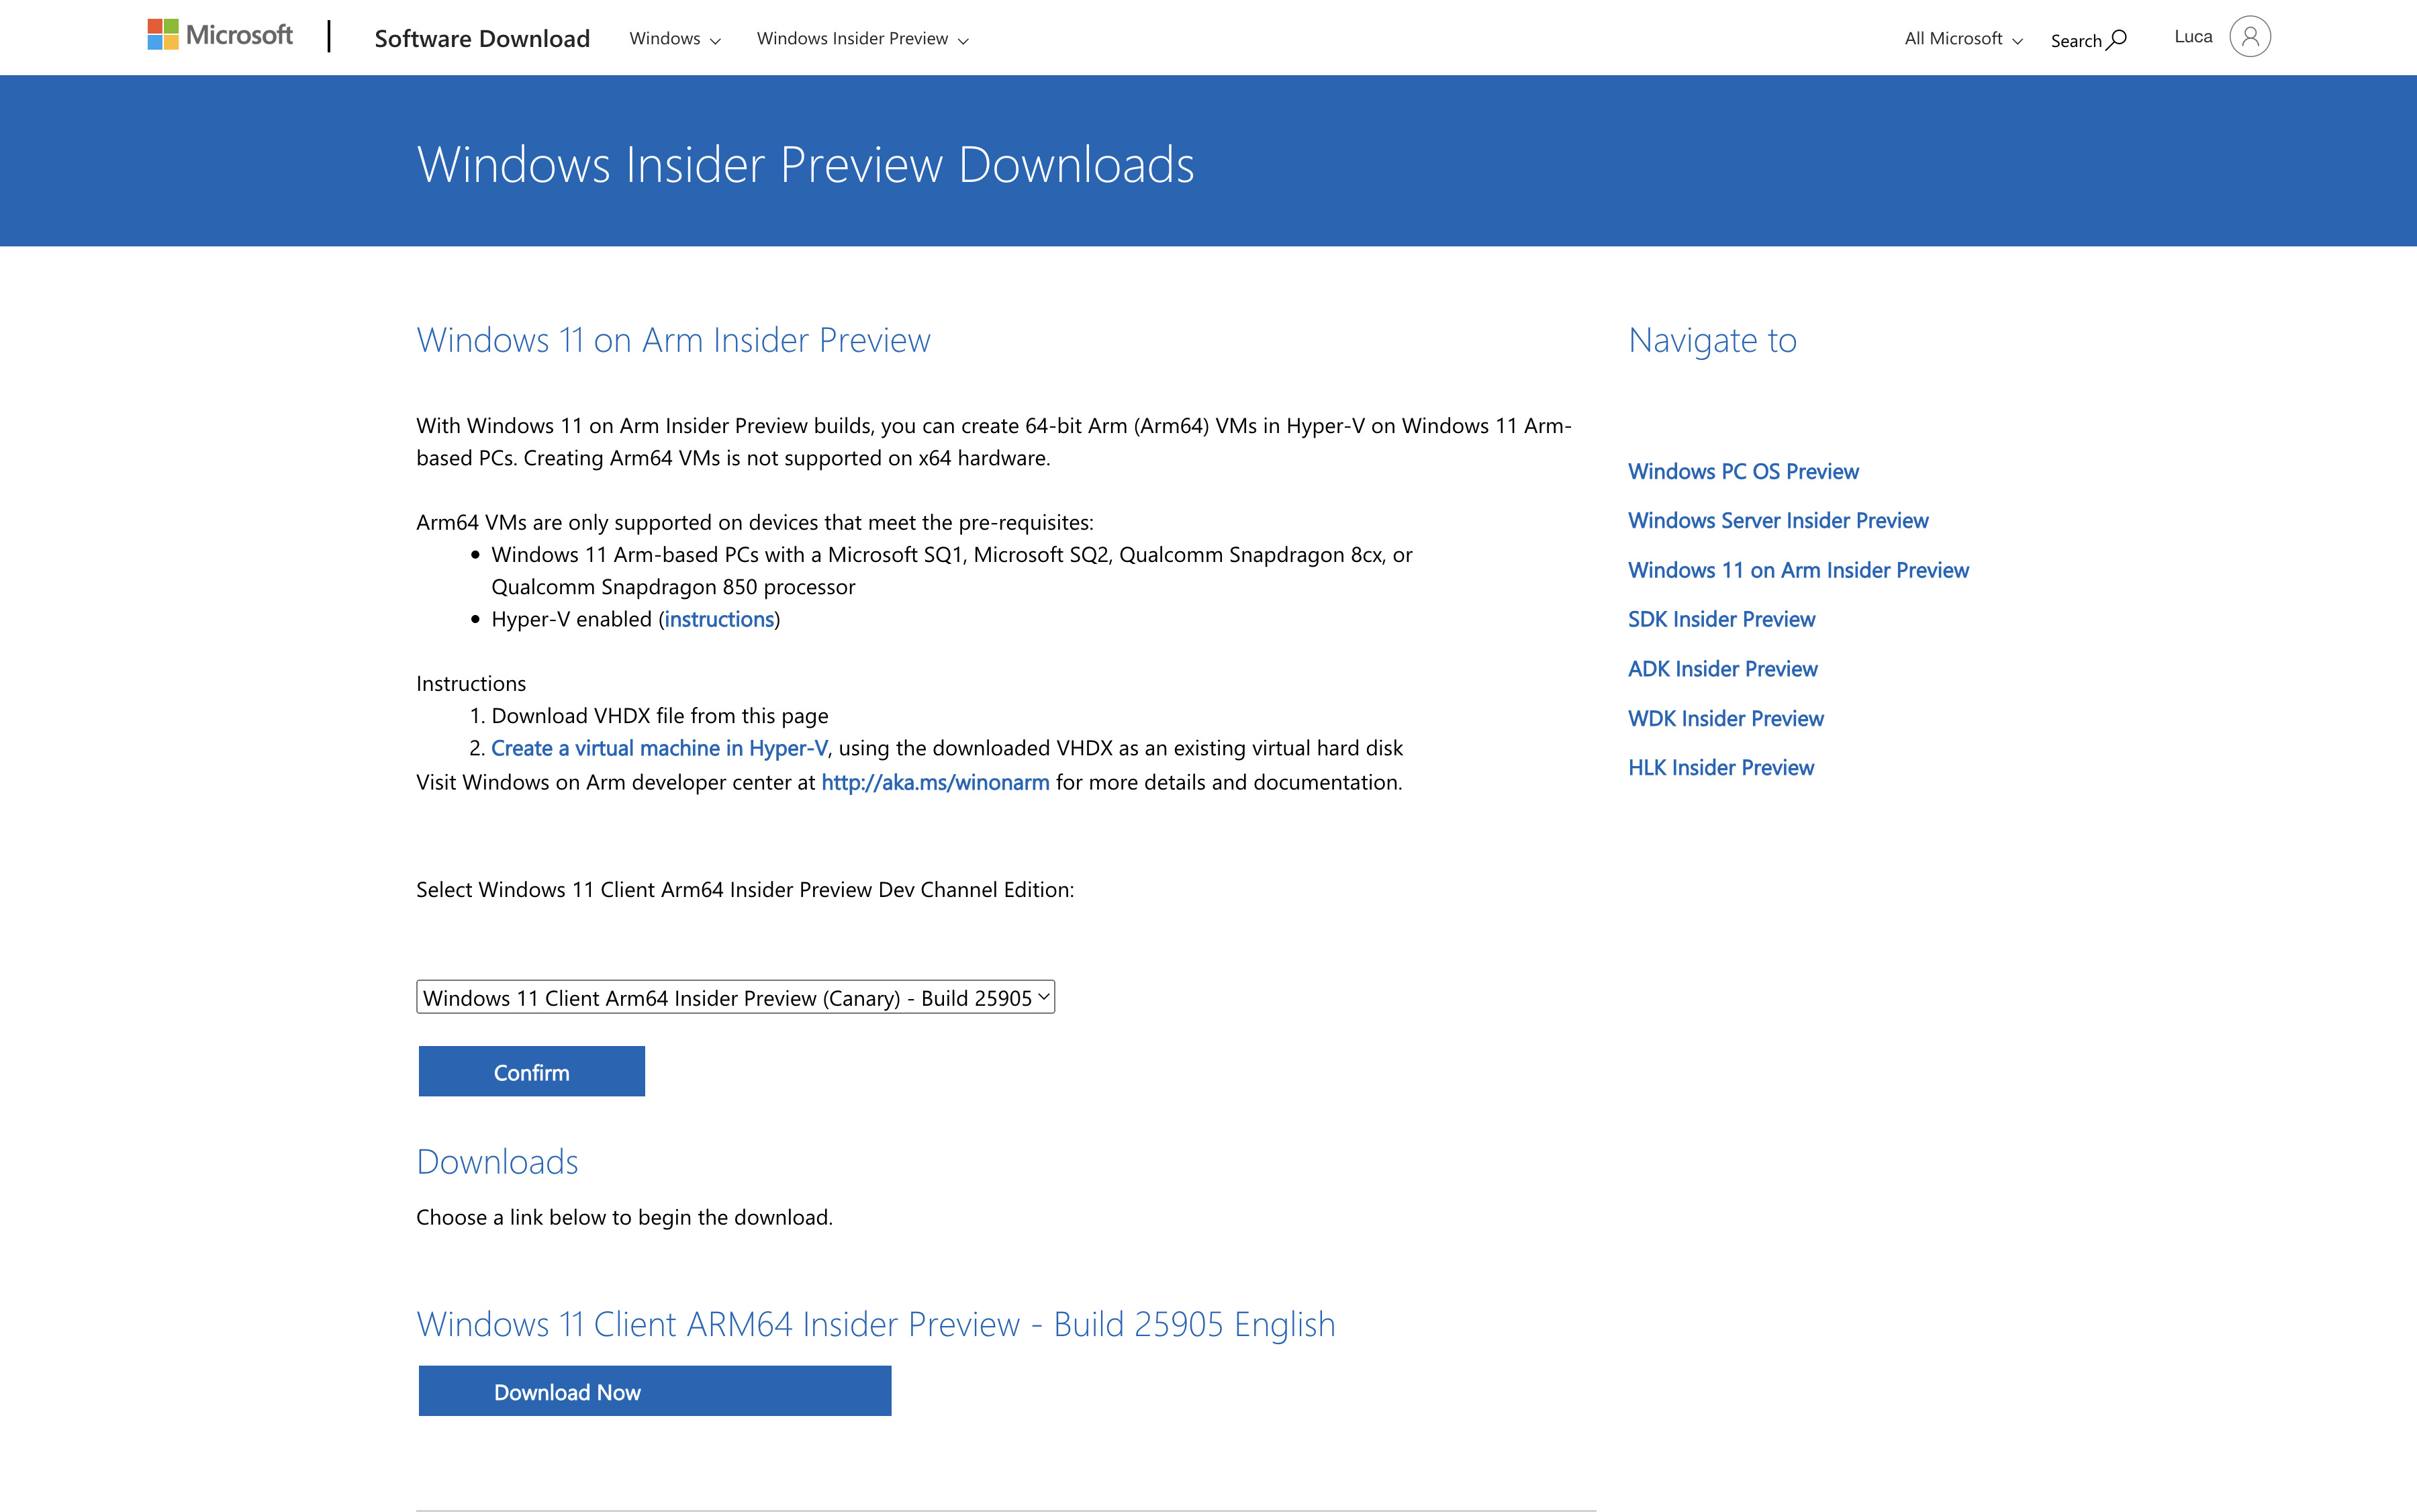
Microsoft’s Windows 11 ARM64 Insider Preview offers an exciting opportunity for users to experience Windows 11 on ARM-based devices. This includes support for ARM64 architecture, allowing it to run seamlessly on ARM-based processors, such as Apple’s M1, M2, and potentially M3 chips.
Links
- https://www.microsoft.com/en-us/software-download/windowsinsiderpreviewarm64
Step-by-Step Guide
While running Windows 11 on Apple Silicon might sound complex, it can be achieved with the right set of tools and instructions. Here’s a step-by-step guide to help you get started.
Virtual Machine
1. Preparation:
— Ensure you have a supported Apple Silicon device (M1, M2, or M3) with sufficient storage space and memory.
— Download the Windows 11 ARM64 Insider Preview ISO file in VHDX format (Hyper-V) from the official Microsoft website. https://www.microsoft.com/en-us/software-download/windowsinsiderpreviewarm64
2. Install VMware Fusion, Oracle VM VirtualBox, or Parallels Desktop:
— VMware Fusion, Oracle VM VirtualBox, or Parallels Desktop are virtualization software that allows you to run multiple operating systems on your Mac. Ensure you have the latest version compatible with Apple Silicon.
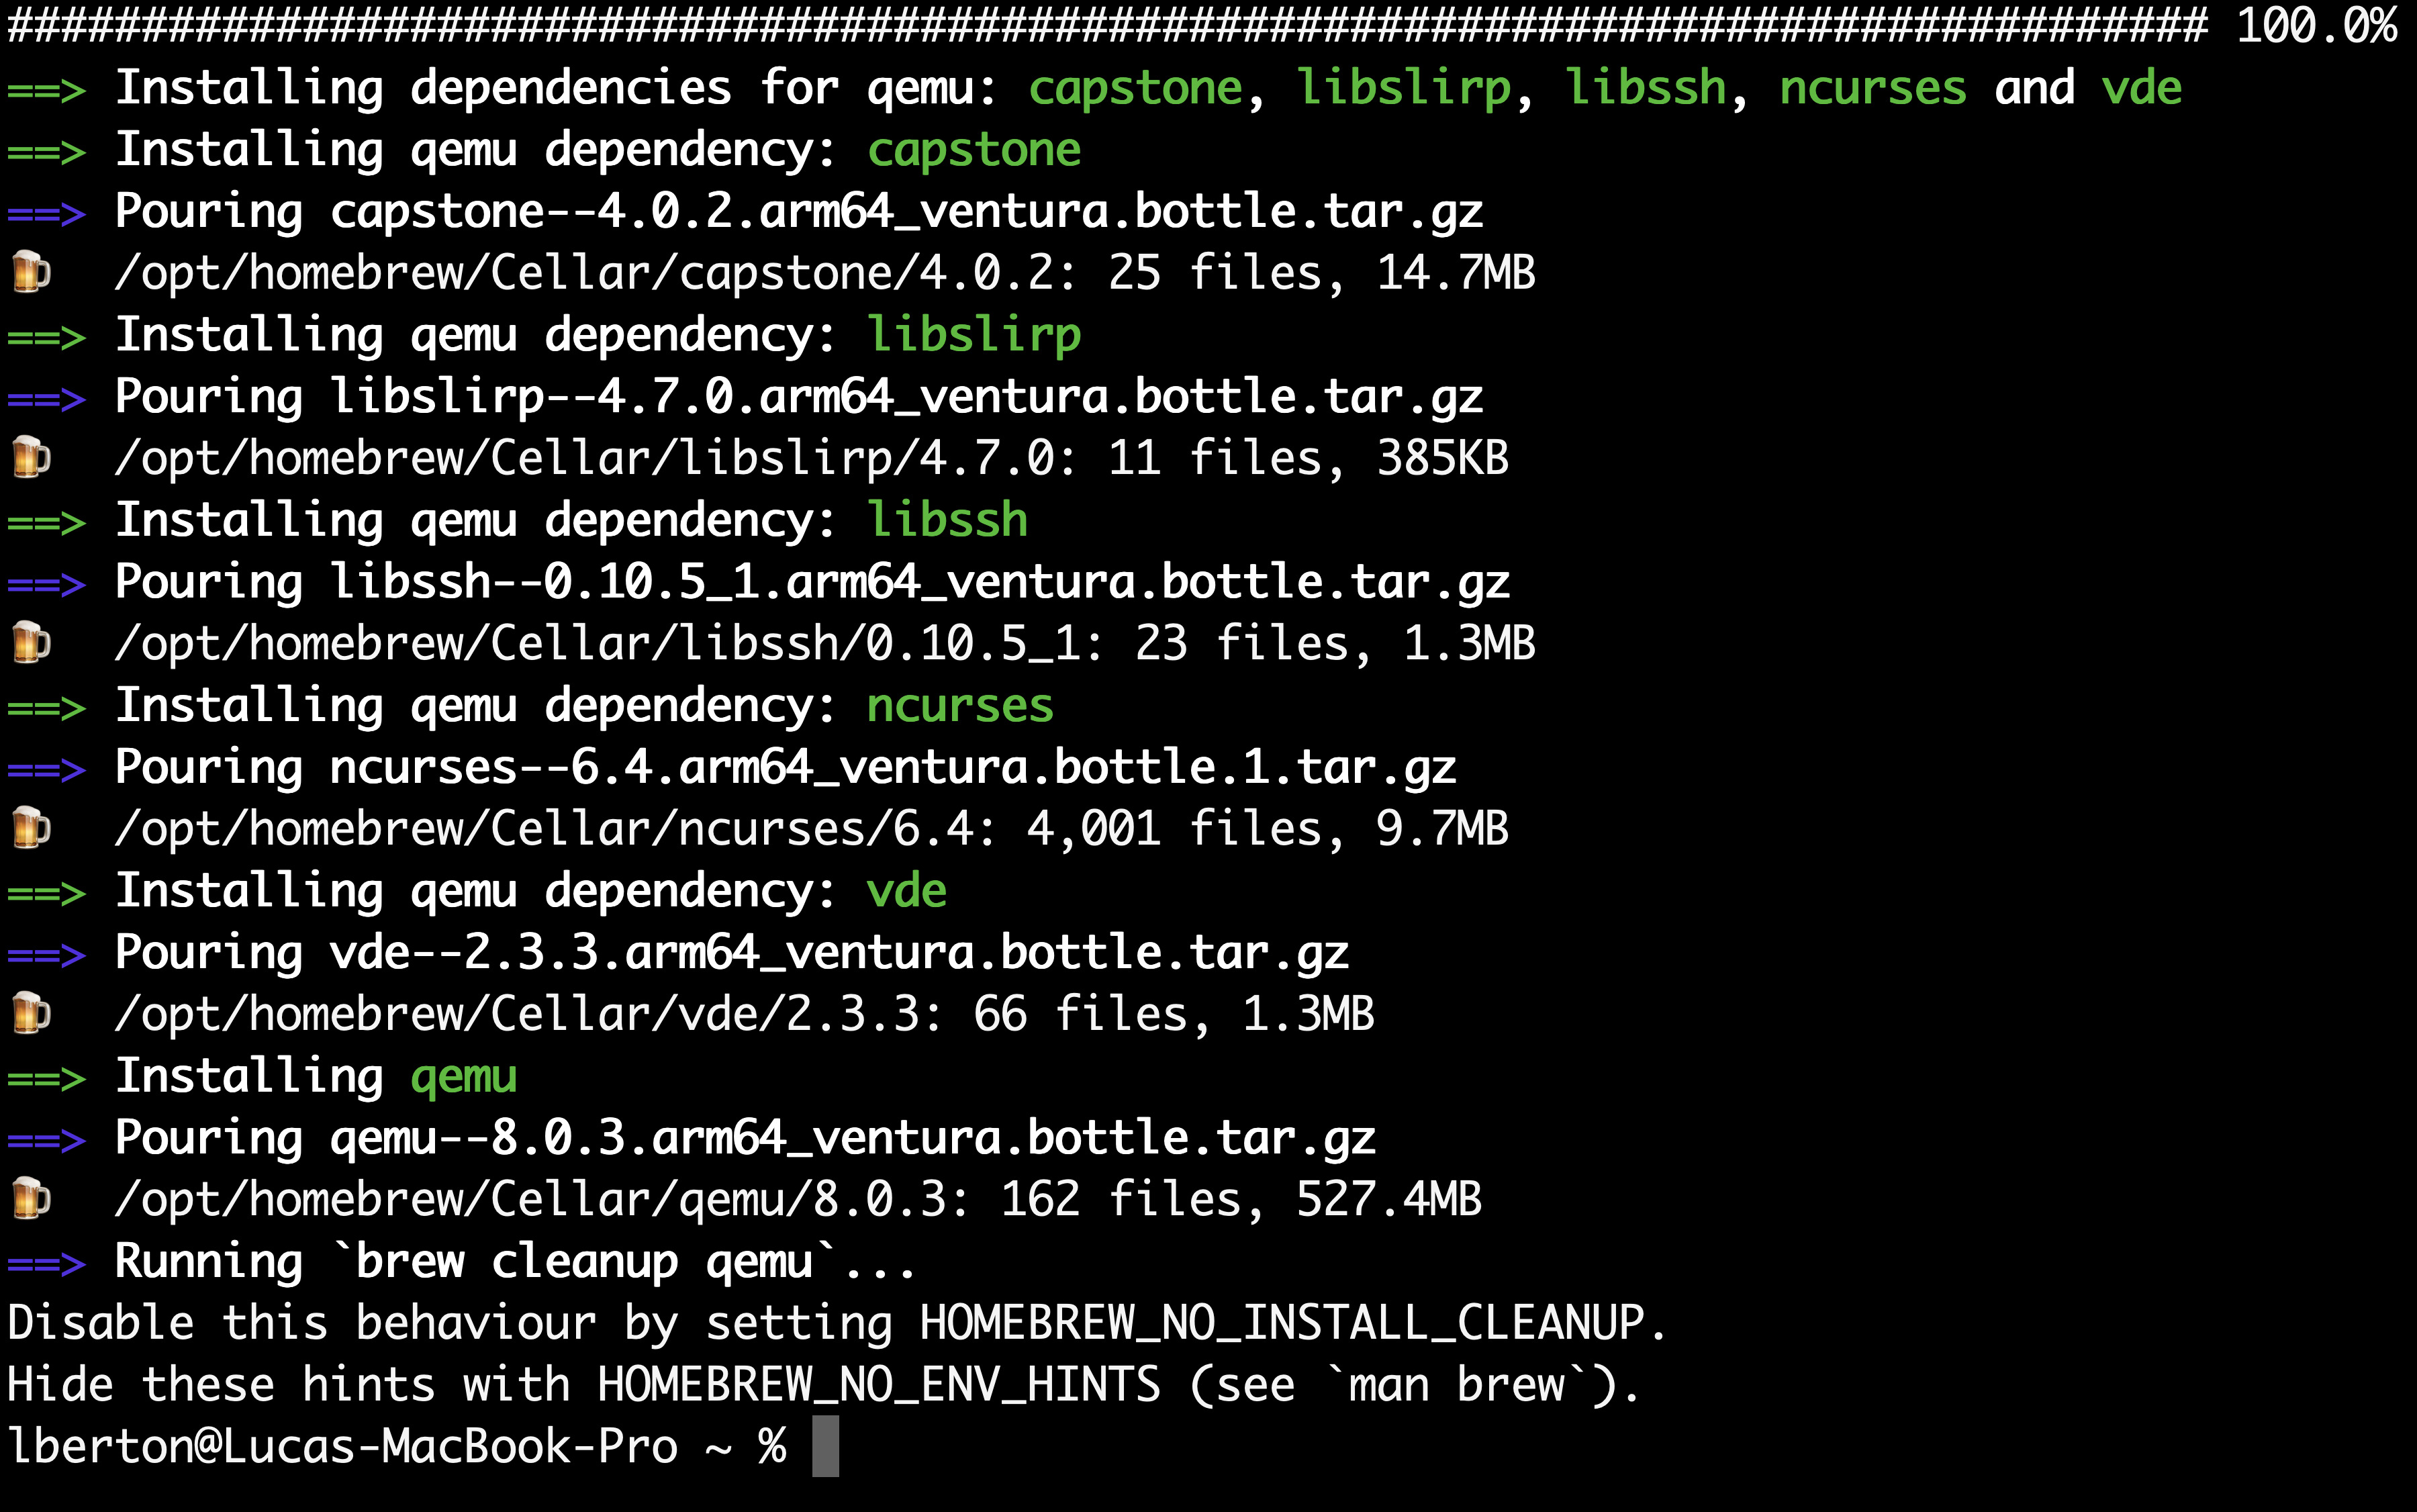
3. Installing QEMU (Quick Emulator) on your Mac using Homebrew is a straightforward process that allows you to create virtual machines and emulate various architectures. Install Homebrew (if not already installed): If you don't have Homebrew installed on your Mac, you can install it by opening Terminal and executing the following command:
``bash
/bin/bash -c "$(curl -fsSL https://raw.githubusercontent.com/Homebrew/install/HEAD/install.sh)"
`
4. Update Homebrew: It's a good practice to update Homebrew before installing any packages. Run the following command in the Terminal:
`bash
brew update
`
5. Install QEMU: Once Homebrew is up-to-date, you can install QEMU by executing the following command:
`bash
brew install qemu
``
6. Verify